Source:https://thearchitectsdiary.com
A few years ago, I was hired to remodel a 1980s suburban home for a couple who both transitioned to remote work. They were miserable, feeling stifled and disconnected. When I walked into their house, I instantly saw why: the floor plan looked like a giant waffle, chopped up into tiny, dark, claustrophobic cubicles by non-load-bearing drywall. They were literally working in silos, suffering from creative fatigue simply because their environment lacked flow.
As a builder with over a decade of hands-on experience swinging sledgehammers and configuring blueprints, I’ve seen firsthand how walls don’t just divide rooms—they divide minds. In the modern era of hybrid work and integrated living, spatial psychology is everything.
Transitioning your property into an open concept layout is about much more than just making a house look bigger. When engineered strategically, it can radically supercharge your daily focus, communication, and overall cognitive output.
Why an Open Concept Layout Changes the Productivity Game
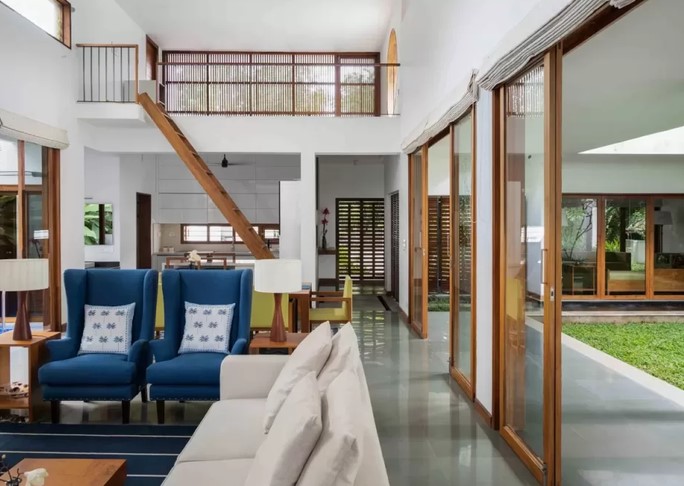
Think of a traditional, segmented floor plan as a series of small, isolated software apps running simultaneously on your computer; each requires you to open a separate window, slowing down your system’s overall processing speed. An open concept layout, on the other hand, operates like an integrated dashboard. It allows natural light, airflow, and human communication to glide across your entire living ecosystem without friction.
When we break down physical barriers, we remove the mental friction that causes stagnation. In my years of executing structural reconfigurations, clients consistently report an unexpected side effect after the walls come down: they feel more energetic, less anxious, and significantly more motivated to tackle deep-focus tasks.
The Science of Light and Air Movement
It’s not just a placebo effect. There is hard technical data behind why fluid spaces boost human performance.
-
Daylight Harvesting: Eliminating interior partitions allows natural light from peripheral windows to penetrate deep into the core of the house, regulating your circadian rhythm and crushing afternoon fatigue.
-
Passive Airflow Regulation: Without micro-walls trapping stale air, your HVAC system distributes ventilation evenly, maintaining optimal oxygen levels that keep your brain sharp during long work blocks.
Architectural Engineering: How to Safely Remove the Barriers
For beginners and intermediate homeowners looking at a sledgehammer with ambition, let’s pause for a reality check. You cannot just blindly smash through drywall. Creating a successful open concept layout requires a firm understanding of your home’s skeletal structure.
Identifying the Load-Bearing Monsters
Before a single tool touches your walls, you must determine whether a partition is load-bearing (holding up your roof or upper floor) or merely a curtain wall (a simple divider).
Pro Tip: Look into your basement or attic. If a wall sits directly above a support girder, steel beam, or runs perpendicular to your ceiling joists, it’s highly likely a load-bearing wall.
Structural Substitutions: LVL and Steel Headers
To eliminate a load-bearing wall safely, you must transfer that heavy downward force to the foundation using horizontal engineering elements. This is where we swap wood studs for Laminated Veneer Lumber (LVL) beams or structural steel I-beams.
These headers span the newly opened gap, resting their immense weight on multi-ply jack studs at either end. It’s a precise calculation that requires an architectural engineer’s stamp, but the result is a completely unobstructed, seamless ceiling line.
+-------------------------+-----------------------------------+-----------------------------------+
| Structural Element      | Traditional Segmented Layout      | Modern Open Concept Layout        |
+-------------------------+-----------------------------------+-----------------------------------+
| Natural Light Profile   | Isolated to outer perimeter rooms | Evenly distributed core lighting  |
| HVAC Load Management    | Frequent micro-zones/stale spots | Uniform thermodynamic balancing  |
| Spatial Communication   | High audio/visual isolation       | Flexible, sight-line optimization|
| Structural Support      | Repetitive interior load walls    | Engineered LVL or Steel Headers   |
+-------------------------+-----------------------------------+-----------------------------------+
Zoning for Focus: The Art of “Broken-Plan” Design
The biggest mistake intermediate DIYers make when designing an open concept layout is treating the space like an empty warehouse. If you just throw a desk, a sofa, and a kitchen island into one giant room without a strategy, your productivity will plummet due to visual noise and echo.
To make an open space functional for work, you must implement what we in the industry call broken-plan design—using non-structural visual cues to define distinct functional zones.
Spatial Zoning Techniques
-
Acoustic Ceiling Drop-Downs: Lowering a section of the ceiling dry-wall over your designated home office zone by just a few inches creates a distinct “room within a room” feeling without adding walls.
-
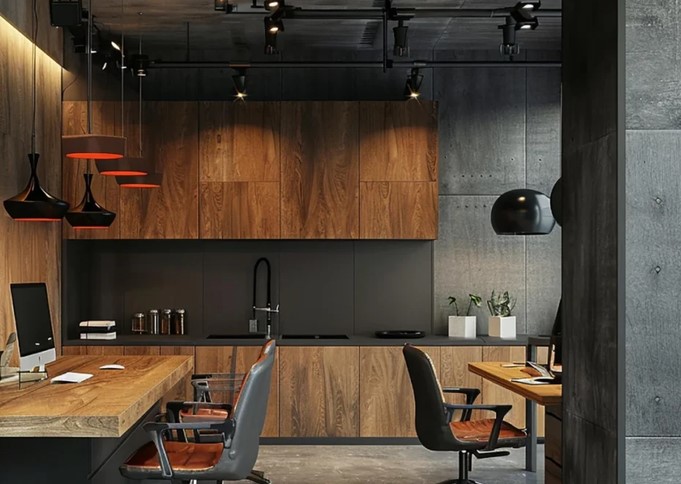
Flooring Material Transitions: Run warm white oak engineered hardwood through your main workspace, but transition smoothly to a durable slate tile as you enter the kitchen zone. This tells your brain exactly when it’s time to work and when it’s time to rest.
-
Strategic Sightlines: Position your desk so your back faces the high-traffic kitchen area, and your view is oriented toward a window or a clean feature wall. If you can see dirty dishes from your workstation, your brain will constantly wander away from your actual tasks.
The Acoustic Echo Trap
When you remove drywall and carpeting to create an open space, you inadvertently create an acoustic playground. Sound waves bounce off hard surfaces like glass windows, quartz countertops, and hardwood floors, creating a hollow echo that ruins Zoom calls. Always budget for sound attenuation. Incorporate plush area rugs, heavy linen drapery, or decorative acoustic felt wall panels into your design to absorb stray decibels.
Technical Elements You Cannot Ignore
If you are planning to modify your floor plan, you need to think ahead about the hidden infrastructure buried inside those old walls. Over my 10+ years on the job site, mechanical rerouting is always the trickiest piece of the puzzle.
HVAC Supply and Return Lines
Walls often act as vertical highways for your heating and cooling ducts. When you pull a wall down, you have to reroute those bulky tin ducts. This usually means building a clean horizontal soffit along the ceiling or feeding the ductwork down through the floor joists to keep the sightlines perfectly clear.
Electrical Home Runs
Your home office needs clean, stable power. When opening up a space, make sure to plan for floor-mounted electrical outlets. If your desk sits out in an open zone away from perimeter walls, the last thing you want is a hazardous, ugly extension cord stretching across your main walking paths.
Investing in Your Cognitive Environment
Ultimately, home improvement shouldn’t just be measured by the resale value it adds to your property—it should be measured by how effectively it improves your quality of life. An engineered open concept layout breaks down the physical and psychological barriers that slow down your day. By welcoming daylight, maximizing structural flow, and zoning your spaces with intention, you turn your home into an absolute powerhouse of daily productivity.
Over to You!
Are you currently working in a cramped, walled-off space, or are you planning a renovation to open things up? What structural challenges are holding you back from making the leap? Let’s talk about your floor plan goals, structural beam concerns, or zoning ideas in the comments below!