Source:https://cdn.hibuwebsites.com
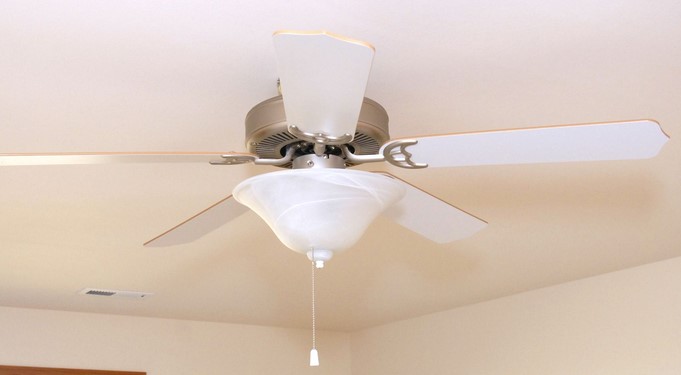
It starts as a faint rhythmic thump-thump-thump. You try to ignore it, but as you click the wall switch to “High,” your ceiling fan begins to oscillate so violently it looks like it’s preparing for liftoff. In my decade of troubleshooting high-end residential interiors, I’ve seen homeowners literally move furniture out from under a wobbling fan, fearing it might fall.
The truth is, a fan rarely falls, but that “wobble” is a mechanical cry for help. It’s grinding down the motor bearings, loosening the mounting bracket, and wasting energy. Achieving a perfect ceiling fan balance isn’t just about silence; it’s about preserving the lifecycle of your hardware and ensuring your home remains a sanctuary rather than a construction zone.
The Physics of the Wobble: Why Fans Lose Their Center
In my early years as a contractor, I assumed a wobble meant a cheap fan. I was wrong. I’ve seen $1,000 designer fans shake just as much as a $50 box-store special. A ceiling fan is essentially a high-torque centrifugal machine. If one blade is just a few grams heavier than the others, or if it sits at a slightly different angle, the entire center of gravity shifts.
Think of it like a car tire. If the tire is out of balance by even half an ounce, your steering wheel vibrates at high speeds. Your ceiling fan is the same. The “wobble” is the physical manifestation of asymmetric centrifugal force.
The Three Usual Suspects
Before we dive into the technical tuning, we have to identify the source. In 90% of my service calls, the issue stems from:
-
Accumulated Debris: A thick layer of dust on one blade acts like a lead weight.
-
Hardware Fatigue: Screws at the blade iron (the arm holding the blade) often loosen due to constant vibration.
-
Warping: In humid environments, wooden blades can absorb moisture unevenly, changing their weight and aerodynamic “lift.”
Step 1: The “Deep Clean” and Tighten Protocol
Before you spend a dime on a balancing kit, you must perform what I call the “Maintenance Baseline.” I once spent an hour trying to balance a fan in a coastal kitchen, only to realize that a buildup of grease and kitchen grime on the leading edge of one blade was the culprit.
-
Clean the Blades: Use a microfiber cloth and a mild degreaser. Clean the top, bottom, and edges.
-
The Hardware Audit: Take a screwdriver and manually check every screw connecting the blades to the blade irons, and the irons to the motor housing.
-
The Hanger Ball Check: Ensure the “ball” at the top of the downrod is seated firmly in the groove of the mounting bracket. If it’s shifted, no amount of weight will fix the shake.
Step 2: Precision Measuring (The Yardstick Test)
This is a trick I learned from a veteran electrician. You don’t need fancy sensors to find a tracking error.
-
Pick a fixed point on the ceiling.
-
Hold a yardstick vertically against that point so the end of the stick just touches the edge of a fan blade.
-
Manually rotate the fan, checking the height of every blade against that same point.
If one blade is even 1/8th of an inch higher or lower than the others, your fan is “out of track.” This usually means a blade iron is bent. I usually fix this by applying very gentle pressure to the bracket to align it with the others—but be careful; cast zinc brackets can snap if you’re too aggressive.
Step 3: Using a Ceiling Fan Balance Kit
If your fan is clean, tight, and tracking straight but still wobbling, it’s time for ceiling fan balance tuning using a weight kit. These kits usually consist of a plastic U-shaped clip and several adhesive lead or steel weights.
The Trial-and-Error Method
-
The Clip Test: Turn the fan on and note the severity of the wobble. Turn it off. Attach the plastic clip to the trailing edge of any blade, halfway down its length.
-
The Rotation: Turn the fan back on. Did the wobble get better or worse? Repeat this process for every blade until you find the one where the clip reduces the wobble the most.
-
The Slide: Once you’ve found the “problem” blade, slide the clip up and down the length of that blade. There will be a “sweet spot” where the vibration almost disappears.
Permanent Weight Placement
Once the clip has stabilized the fan, peel the backing off an adhesive weight. Stick it on the top center of the blade, directly in line with where the clip was located. Remove the plastic clip and test again. You might need to add a second weight depending on the motor’s RPM.
Pro Advice: Advanced Tuning Insights
Tips Pro: The “Shadow” Trick
If you’re struggling to see the wobble clearly, turn on the fan and shine a bright flashlight or a work light across the ceiling. The shadow cast by the blades will amplify the movement, making it much easier to see if the fan is oscillating or simply vibrating.
The Electrical Box
If you balance the blades perfectly and the fan still has a slight sway, check the junction box in the ceiling. Many DIYers install fans on standard plastic “light fixture” boxes. A ceiling fan must be mounted to a fan-rated metal box braced to the joists. A standard box can fail over time, which is a significant safety hazard.
The Benefits of a Balanced System
When you achieve perfect ceiling fan balance, you aren’t just getting rid of an annoying sound. You are:
-
Reducing Amperage Draw: A balanced fan moves air more efficiently, putting less strain on the capacitor and motor windings.
-
Silencing the “Canopy Click”: That annoying clicking sound is usually the housing rubbing against the mounting bracket due to the wobble.
-
Enhancing Airflow: A stable fan maintains a consistent “cone” of air, which improves the cooling effect (wind chill factor) in the room.
Maintenance for the Long Haul
I recommend checking your fan’s balance once a year, preferably in the spring before heavy use begins. Screws naturally loosen over a season of rotation. If you live in a high-humidity area, be especially vigilant with MDF or wood-veneer blades, as they are most prone to “wilting” or losing their aerodynamic profile.
Think of your ceiling fan as a piece of precision machinery. You wouldn’t drive your car for years without a tire rotation; don’t expect your fan to provide silent comfort without a little mechanical love.
Conclusion: Take Control of Your Comfort
A wobbling ceiling fan is a distraction you don’t have to live with. With a simple yardstick, a $5 balancing kit, and thirty minutes of patience, you can transform a noisy, shaking fixture into a silent, efficient cooling machine.
Does your fan have a rhythmic “thump” that’s been driving you crazy? Try the yardstick test today and see which blade is the culprit. If you run into a stubborn wobble that won’t go away, or if you’re unsure about your mounting bracket, drop a comment below—I’ve tackled thousands of these and I’m here to help you get your home back to a state of perfect equilibrium!