Source:https://allbrick.com5
Picture this: It’s a crisp Friday evening, and a properties’ communal courtyard or a homeowner’s backyard is dead silent. The expensive outdoor kitchen sits unused, and the designer patio furniture is gathering dust. Millions of dollars are spent annually on upscale amenities that look great in brochures but fail to gather an actual crowd.
Over my 10 years in the home improvement and property management sectors, I’ve seen countless property owners make the mistake of equating high cost with high engagement.
Then, we rolled out a simple, budget-friendly experiment at a multi-family property I was consulting for. We bypassed the $10,000 outdoor fireplace and installed an inexpensive fire pit setup for under $300. The result? Within a week, that dead zone became the undisputed social hub of the community.
Fire is the ultimate biological internet; it has been pulling people into circles for millennia. Here is a deep dive into how you can leverage an inexpensive fire pit to drive massive social engagement without melting your budget.
Why Fire Pits Are the Ultimate ROI Champions
In the home improvement game, we measure success by ROI (Return on Investment). But when it comes to shared spaces, we also need to measure ROE—Return on Engagement.
The Cost-to-Engagement Paradox
Many beginners assume that to attract people, you need to install high-end amenities like heated pools or elaborate outdoor kitchens. In reality, these often require high maintenance, strict scheduling, or liability waivers.
An inexpensive fire pit, on the other hand, breaks down barriers. It acts like a visual thermostat, instantly making an outdoor space feel cozy, warm, and welcoming.
The Psychology of the Hearth
Think of a fire pit as the physical equivalent of a “trending topic” on social media. It creates a natural focal point. People don’t just sit around a fire pit to get warm; they sit there because the flickering light lowers social anxiety, prompts storytelling, and encourages eye contact in a way that structured indoor seating never can.
Choosing the Right Inexpensive Fire Pit: Material and Fuel Dynamics
When you start shopping, the sheer volume of options can be overwhelming. As a rule of thumb, you don’t need a custom masonry masterpiece to move the needle. Here is how the technical specs break down for budget-friendly models.
1. Steel and Cast Iron Bowls (The Budget Royalty)
If you want the highest visual impact for the lowest cost, lightweight steel or cast iron fire bowls are your best bet. They are highly portable, meaning you can test different locations on your property to see where people naturally gather.
-
Pros: Extremely affordable, easy to assemble, radiates heat 360 degrees.
-
Cons: Will develop a rust patina over time if left unprotected (though some folks prefer this rustic look).
2. Propane vs. Wood-Burning: The Operational Trade-Off
This is the biggest decision you’ll face, and it impacts both your budget and long-term maintenance.
| Feature | Wood-Burning Pit | Propane Fire Pit |
| Upfront Cost | Exceptionally Low | Moderate |
| Ambience | High (Crackling sound, authentic smell) | Medium (Clean flame, no smoke) |
| Maintenance | Requires ash cleanup & wood storage | Requires tank refills or gas line |
| Safety Control | Harder to extinguish instantly | Instant on/off switch |
My Professional Take: If this is for a rental property or a community space where supervision is minimal, go with a budget-friendly propane unit. The instant-off switch eliminates the risk of unattended smoldering embers. If it’s for a private residence or a highly managed space, nothing beats the sensory engagement of real firewood.
Strategic Placement: Designing for Natural Human Interaction
You can’t just throw a fire pit in the middle of a yard and expect magic to happen. The layout requires intent.
The “Goldilocks Zone” of Seating
To drive engagement, seating must be close enough to promote conversation but far enough back to prevent overheating.
-
The Golden Ratio: Maintain a radius of 4 to 5 feet from the edge of the fire pit to the front of the chairs.
-
The Circle of Trust: Always arrange seating in a circular or semi-circular pattern. Linear seating kills conversation; circles cultivate it.
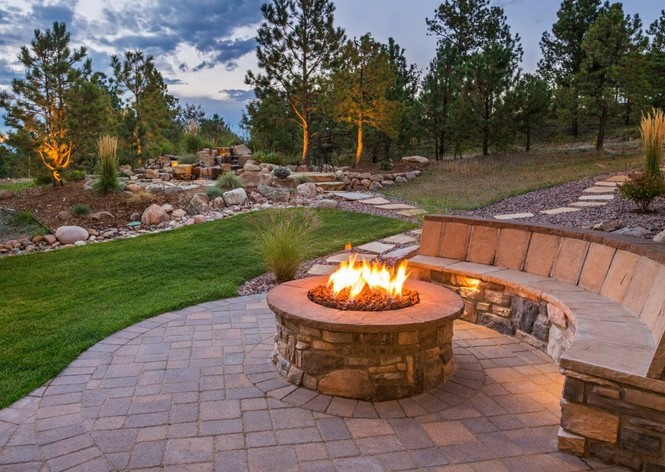
Hardscaping on a Dime
Do not place a portable fire pit directly on a wood deck or dry grass—that is a massive fire hazard. Instead, create a dedicated zone using inexpensive pea gravel, crushed limestone, or basic concrete pavers. This not only ensures safety but visually defines the fire pit area as a distinct “destination” within the property.
💡 Pro Tip: The Three-Layer Ground Defense
To create an ultra-safe, low-cost base over grass, clear a 10-foot diameter circle. Lay down a weed barrier fabric, add a 2-inch layer of leveling sand, and top it with pea gravel. It looks incredibly high-end, drains perfectly during rain, and isolates the fire zone flawlessly.
Navigating Safety, Codes, and Longevity
Before you rush out to buy your setup, let’s talk about the roadblocks that can stall your project. As an expert, I’ve had to bail out clients who skipped these vital technical checks.
-
Check local HOA and Municipal Codes: Many cities have strict regulations regarding open flames, minimum distance requirements from structures (usually 10 to 21 feet), and “no-burn” days due to air quality.
-
The Drainage Trap: If you build a DIY stone pit or use a heavy bowl, ensure there is a drainage hole at the bottom. A fire pit that collects rainwater quickly turns into a foul-smelling mosquito breeding ground.
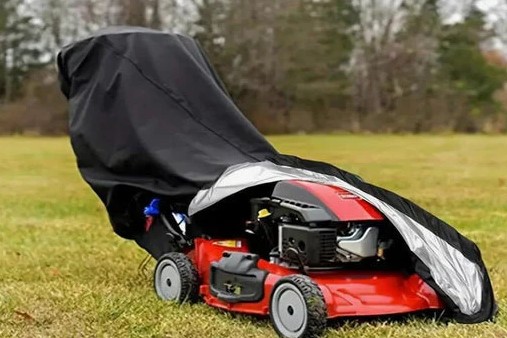
-
Invest in a Cover: The fastest way to ruin an inexpensive fire pit is to let water sit in it. Spend an extra $20 on a heavy-duty, weatherproof vinyl cover. It will triple the lifespan of your investment.
Conclusion: Ignite Your Community Engagement
Transforming an outdoor space from an empty landscape into a vibrant social hub doesn’t require a five-figure renovation. By strategically installing an inexpensive fire pit, choosing the right fuel dynamics, and formatting the seating to encourage natural human geometry, you create an irresistible destination.
It is the single most cost-effective amenity upgrade you can make to any property.
Have you tried adding a fire feature to your space, or are you trying to decide between wood and propane? Leave a comment below with your layout challenges, and let’s troubleshoot your outdoor space together!