Month: July 2024

Woodworking Wonders: Exploring the Magic of Elmer’s Wood Glue

Source : https://m.media-amazon.com

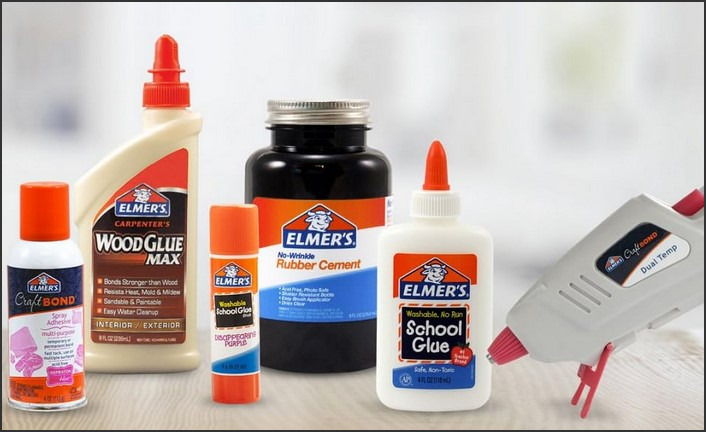
Woodworking Wonders: Exploring the Magic of Elmer’s Wood Glue is an in-depth examination of the transformative role that Elmer’s Wood Glue plays in the world of woodworking. This comprehensive guide delves into the unique properties and applications of this adhesive, highlighting its strength, versatility, and ease of use. From simple home repairs to intricate woodcrafts, the book showcases how Elmer’s Wood Glue has become an indispensable tool for both amateur and professional woodworkers. It also provides practical tips and techniques for using this glue to achieve the best results, making it a valuable resource for anyone interested in woodworking.

Woodworking Wonders: Exploring the Magic of Elmer’s Wood Glue in Vinyl Tile Backsplash Installation

Woodworking Wonders: Exploring the Magic of Elmer’s Wood Glue in Vinyl Tile Backsplash Installation

Woodworking is an art that requires precision, patience, and the right tools. Among these tools, one that often goes unnoticed but plays a crucial role is wood glue. Specifically, Elmer’s Wood Glue has been a staple in the woodworking industry for years, known for its superior bonding strength and versatility. However, its application extends beyond traditional woodworking. One such unconventional use is in the installation of vinyl tile backsplash, a popular choice for modern kitchens and bathrooms.

Elmer’s Wood Glue is a PVA (polyvinyl acetate) adhesive, a type of glue that is water-based and non-toxic. It is renowned for its strong bonding capabilities, making it an excellent choice for woodworking projects. But what makes it suitable for vinyl tile backsplash installation? The answer lies in its unique properties.

Firstly, Elmer’s Wood Glue is incredibly easy to work with. Its smooth consistency allows for easy application and spread, ensuring an even layer of adhesive. This is particularly important when installing vinyl tile backsplash, as an uneven application of glue can lead to tiles not adhering properly or creating an uneven surface.

Secondly, Elmer’s Wood Glue is known for its strong bonding strength. When applied correctly, it creates a bond that is difficult to break. This is crucial in backsplash installation, where the tiles need to withstand the rigors of daily kitchen activities. The adhesive strength of Elmer’s Wood Glue ensures that the tiles stay in place, providing a durable and long-lasting backsplash.

Moreover, Elmer’s Wood Glue is water-resistant when dry. This makes it an excellent choice for areas like the kitchen and bathroom, where the backsplash is often exposed to moisture. The water-resistant nature of the glue ensures that the bond remains strong even when exposed to water, preventing the tiles from peeling off or becoming loose over time.

Another advantage of using Elmer’s Wood Glue in vinyl tile backsplash installation is its drying time. The glue dries clear and does so relatively quickly, allowing for faster project completion. This is particularly beneficial in a backsplash installation, where time is often of the essence.

Lastly, Elmer’s Wood Glue is non-toxic and safe to use. This is an important consideration, especially in a kitchen setting where food preparation takes place. The non-toxic nature of the glue ensures that it is safe to use around food and does not pose any health risks.

In conclusion, Elmer’s Wood Glue, while traditionally used in woodworking, has proven to be an effective adhesive in the installation of vinyl tile backsplash. Its ease of use, strong bonding strength, water resistance, quick drying time, and non-toxicity make it a versatile tool in any DIY enthusiast’s arsenal. So, the next time you embark on a home improvement project, consider the magic of Elmer’s Wood Glue. It might just be the secret ingredient you need to achieve a professional and durable finish.

Vinyl Vision: Tile Backsplash Ideas for a Modern Kitchen

Source : https://i8.amplience.net

Vinyl Vision: Tile Backsplash Ideas for a Modern Kitchen is a comprehensive guide that provides innovative and stylish ideas for kitchen backsplashes using vinyl tiles. It explores the versatility and durability of vinyl as a material, showcasing various designs, patterns, and color schemes that can transform any kitchen into a modern, chic, and functional space. This guide aims to inspire homeowners to consider vinyl tiles as a cost-effective and aesthetically pleasing solution for their kitchen backsplash needs.

Incorporating Vinyl Vision: Tile Backsplash Ideas for a Modern Kitchen with Toilet Paper Folding Techniques

In the realm of interior design, the kitchen is often considered the heart of the home. It is a space where functionality meets aesthetics, and where every element, from the countertops to the backsplash, plays a crucial role in defining the overall ambiance. One of the most popular materials for creating a stylish and modern kitchen is vinyl. Known for its durability, versatility, and affordability, vinyl offers a plethora of design possibilities that can transform your kitchen into a contemporary culinary haven.

Vinyl tiles, in particular, have become a go-to choice for many homeowners when it comes to kitchen backsplashes. They are easy to install, require minimal maintenance, and come in a wide array of colors, patterns, and textures. This makes them an ideal choice for those who wish to infuse their kitchen with a touch of modernity without breaking the bank.

One of the most appealing aspects of vinyl tiles is their ability to mimic other materials. For instance, you can opt for vinyl tiles that resemble natural stone or wood, giving your kitchen a high-end look at a fraction of the cost. Alternatively, you can choose vinyl tiles with bold geometric patterns or vibrant colors to create a striking focal point in your kitchen.

However, the versatility of vinyl tiles extends beyond their appearance. They can also be arranged in various ways to create unique and eye-catching backsplash designs. For instance, you can lay them in a classic subway pattern for a timeless look, or arrange them in a herringbone or chevron pattern for a more contemporary vibe.

While the design possibilities with vinyl tiles are virtually endless, it’s important to consider the overall style and color scheme of your kitchen before making a decision. For a sleek and minimalist kitchen, for instance, you might opt for vinyl tiles in neutral tones and a simple pattern. On the other hand, if your kitchen features bold colors and eclectic decor, you might choose vinyl tiles with a vibrant pattern to complement the space.

Incorporating vinyl vision into your kitchen doesn’t stop at the backsplash. Believe it or not, the art of toilet paper folding can also play a role in enhancing the aesthetic appeal of your kitchen. This might seem like an unlikely pairing at first, but when done right, it can add a unique and unexpected touch to your kitchen decor.

Toilet paper folding, a practice often seen in high-end hotels and restaurants, involves folding the end of a toilet paper roll into a decorative shape. This technique can be adapted for kitchen use by folding paper towels or napkins in a similar fashion. For instance, you could fold your paper towels into a simple fan shape and display them on your kitchen counter or dining table. Not only does this add a touch of elegance to your kitchen, but it also serves a practical purpose by making your paper towels easily accessible.

In conclusion, vinyl tiles and toilet paper folding techniques offer a unique way to incorporate modern design elements into your kitchen. By exploring the versatility of vinyl tiles and the art of toilet paper folding, you can create a kitchen that is not only functional but also visually appealing. Whether you’re renovating your kitchen or simply looking for ways to refresh its look, these ideas offer a creative and cost-effective solution.

Courtyard Bliss: Transformative Ideas for Your Outdoor Space

Source : https://static1.squarespace.com

Courtyard Bliss: Transformative Ideas for Your Outdoor Space is a comprehensive guide that provides innovative and creative ideas to transform your outdoor space into a personal oasis. It offers a range of design concepts, from minimalist to extravagant, to suit various tastes and budgets. The book aims to inspire readers to reimagine their courtyards, patios, or backyards, turning them into functional and aesthetically pleasing spaces for relaxation, entertainment, or even a home garden. It is an essential resource for homeowners looking to enhance their outdoor living experience.

How to Make a Basketball Court: Transformative Ideas for Your Courtyard Bliss

Courtyard Bliss: Transformative Ideas for Your Outdoor Space is a concept that encourages homeowners to view their outdoor spaces as an extension of their living areas. One of the most exciting ways to transform your courtyard into a blissful retreat is by creating a basketball court. This not only provides a fun and engaging activity for the family but also adds a unique aesthetic appeal to your outdoor space.

The first step in creating a basketball court in your courtyard is to determine the size of the court. The size of your court will largely depend on the available space in your courtyard. A half-court setup, which includes one basketball hoop and a playing surface, is ideal for smaller courtyards. For larger spaces, a full-court setup with two hoops and a larger playing surface can be considered.

Once you have determined the size of your court, the next step is to prepare the ground. This involves clearing the area of any debris, leveling the ground, and laying a solid foundation. The foundation can be made of concrete, asphalt, or a modular sports flooring system. Concrete and asphalt are more durable and require less maintenance, but they can be hard on the joints. Modular sports flooring systems, on the other hand, offer better shock absorption and are easier on the joints, making them a popular choice for residential basketball courts.

After the foundation has been laid, the next step is to install the basketball hoop. The hoop can be either in-ground or portable. In-ground hoops are more stable and durable, but they require a more complex installation process. Portable hoops, on the other hand, are easier to install and can be moved around if needed.

Once the hoop is installed, the court surface needs to be marked. This involves painting lines to define the boundaries of the court, the free-throw line, and the three-point line. The paint used should be durable and weather-resistant to withstand outdoor conditions.

Lighting is another important aspect to consider when creating a basketball court in your courtyard. Proper lighting will allow you to enjoy the court during the evening hours and can also enhance the aesthetic appeal of your outdoor space. LED lights are a popular choice for outdoor sports courts due to their energy efficiency and durability.

Finally, consider adding seating areas around the court. This not only provides a place for spectators to sit and enjoy the game but also creates a more inviting and comfortable outdoor space.

In conclusion, creating a basketball court in your courtyard is a transformative idea that can turn your outdoor space into a blissful retreat. It provides a fun and engaging activity for the family, enhances the aesthetic appeal of your outdoor space, and increases the overall value of your home. With careful planning and execution, you can create a basketball court that not only meets your sporting needs but also complements the overall design of your courtyard.

Hoops and Dreams: How to Make a DIY Basketball Court

Source : https://cdn.prod.website-files.com

“Hoops and Dreams: How to Make a DIY Basketball Court” is a comprehensive guide that provides step-by-step instructions on creating a personal basketball court at home. This guide is designed for basketball enthusiasts who wish to bring the game closer to their doorstep. It covers everything from planning the court layout, selecting the right materials, preparing the ground, to painting the lines and installing the hoop. With this guide, you can transform your backyard or any suitable space into a functional basketball court, fostering an environment that encourages physical activity and the love for the sport.

What is Pergola: Incorporating it into Your DIY Basketball Court for Hoops and Dreams

Hoops and dreams often go hand in hand for many basketball enthusiasts. The thrill of the game, the camaraderie of the team, and the satisfaction of a well-executed play are all part of the allure. However, not everyone has access to a professional court. This is where the concept of a DIY basketball court comes into play. With a bit of creativity, some basic materials, and a dash of hard work, you can create your own basketball court right in your backyard. But why stop there? To add an extra touch of elegance and functionality, consider incorporating a pergola into your DIY basketball court design.

A pergola, for those unfamiliar with the term, is an outdoor garden feature forming a shaded walkway, passageway, or sitting area of vertical posts or pillars that usually support cross-beams and a sturdy open lattice. The origin of the pergola dates back to ancient Egyptian, Roman, and Greek civilizations, where they were commonly used in gardens to provide a shaded retreat from the sun. Today, pergolas are popular additions to outdoor spaces, providing both aesthetic appeal and practical benefits.

Incorporating a pergola into your DIY basketball court can serve multiple purposes. Firstly, it can provide a shaded area for players to rest and recuperate between games. This is particularly beneficial in hot climates, where the sun can be relentless. Secondly, a pergola can serve as a visual boundary, delineating the court area from the rest of your outdoor space. This can be particularly useful if you have a large backyard and want to create a dedicated space for basketball.

Creating a pergola as part of your DIY basketball court project is not as daunting as it may seem. The first step is to decide on the size and location of your pergola. It should be large enough to provide ample shade but not so large that it overshadows the court. The location should be convenient for players, ideally at one end of the court.

Once you have decided on the size and location, the next step is to gather your materials. You will need posts, beams, and lattice for the structure, as well as concrete for the footings. The choice of materials can vary depending on your budget and personal preference. Wood is a popular choice for its natural look and durability, but metal or vinyl can also be used.

The construction process involves setting the posts in concrete, attaching the beams to the posts, and then adding the lattice on top. It’s important to ensure that the structure is sturdy and secure, as it will need to withstand wind and weather. If you’re not confident in your construction skills, it may be worth hiring a professional to ensure the job is done correctly.

In conclusion, a pergola can be a valuable addition to your DIY basketball court. Not only does it provide a shaded area for players to rest, but it also adds a touch of elegance to your outdoor space. With some planning, the right materials, and a bit of hard work, you can create a basketball court that is not only functional but also aesthetically pleasing. So why not take your hoops and dreams to the next level by incorporating a pergola into your DIY basketball court design?

Artistic Adventures: Do It Yourself Wall Art for Your Space

Source : https://www.99acres.com

Artistic Adventures: Do It Yourself Wall Art for Your Space is a comprehensive guide that empowers individuals to create their own unique wall art. This book provides step-by-step instructions, techniques, and inspiration for creating a variety of art pieces, from paintings to collages, that can transform any space. It encourages readers to unleash their creativity and personalize their living or working environment with their own artistic expressions. Whether you’re a seasoned artist or a beginner, this guide offers a fun and cost-effective way to enhance your space and express your personal style.

Incorporating DIY Furniture Ideas into Your Artistic Adventures: Creating Unique Wall Art for Your Space

Artistic Adventures: Do It Yourself Wall Art for Your Space

The world of interior design is a vast and exciting realm, filled with endless possibilities for creativity and personal expression. One of the most effective ways to inject personality into your space is through the use of wall art. However, purchasing pre-made pieces can often be costly and may not fully capture your unique style or vision. This is where the concept of Do-It-Yourself (DIY) wall art comes into play. By incorporating DIY furniture ideas into your artistic adventures, you can create unique wall art that perfectly complements your space and reflects your individual taste.

The beauty of DIY wall art lies in its versatility. Whether you prefer a minimalist aesthetic or a more eclectic vibe, there are countless ways to create pieces that align with your design preferences. For instance, you could repurpose old furniture, such as wooden pallets or vintage frames, into rustic wall hangings. Alternatively, you could experiment with different painting techniques to produce abstract art pieces. The key is to let your imagination run wild and not be afraid to try new things.

In addition to its aesthetic appeal, DIY wall art also offers practical benefits. For one, it can be a cost-effective alternative to buying expensive artwork. By using materials you already have at home or sourcing inexpensive supplies, you can create stunning pieces without breaking the bank. Moreover, DIY projects can be a fun and rewarding way to spend your free time. Not only do you get to engage in a creative activity, but you also end up with a tangible product that you can proudly display in your home.

When embarking on your DIY wall art journey, it’s important to plan ahead. Consider the size and layout of your space, as well as the existing color scheme and decor. This will help you choose a project that will seamlessly blend in with your interior design. Additionally, think about the function of the room. For example, if you’re decorating a home office, you might want to create a piece that inspires productivity, such as a motivational quote or a calming landscape.

Once you’ve decided on a project, gather your materials and get to work. Don’t worry if you’re not an experienced artist or craftsman – the beauty of DIY is that it’s all about personal expression, not perfection. Plus, there are plenty of online tutorials and guides that can help you along the way.

Finally, remember to have fun with it. The process of creating DIY wall art should be enjoyable, not stressful. Take your time, experiment with different ideas, and don’t be afraid to make mistakes. After all, every misstep is an opportunity to learn and grow.

In conclusion, incorporating DIY furniture ideas into your artistic adventures is a fantastic way to create unique wall art for your space. Not only does it allow you to express your personal style, but it also offers a cost-effective solution to decorating your home. So why not give it a try? With a bit of creativity and effort, you can transform your space into a true reflection of your personality.