Source : https://www.marthastewart.com
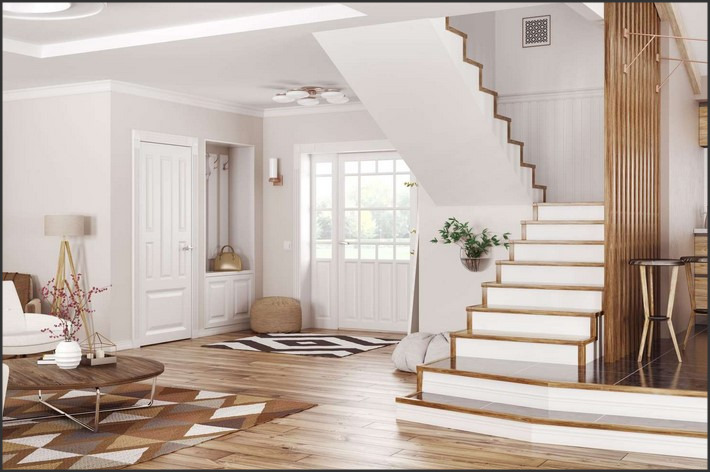
Stairway Stories: The Art of Painting Stairs in Your Home is a comprehensive guide that explores the creative potential of staircases in residential spaces. It delves into the transformative power of paint, providing readers with a wealth of ideas on how to turn their ordinary stairs into extraordinary pieces of art. From choosing the right colors and patterns to mastering the painting techniques, this book offers step-by-step instructions, practical tips, and inspiring examples to help homeowners personalize their stairways and enhance the overall aesthetic of their homes.
Stairway Stories: The Art of Painting Stairs in Your Home and the Role of Stainless Steel Counter Tops
Stairway Stories: The Art of Painting Stairs in Your Home and the Role of Stainless Steel Counter Tops
The art of painting stairs in your home is a unique way to add a personal touch to your living space. It’s a creative endeavor that not only enhances the aesthetic appeal of your home but also tells a story about your personal style and taste. This art form, combined with the use of stainless steel countertops, can transform your home into a modern, stylish, and functional space.
Painting stairs is a project that requires careful planning and execution. The first step is to choose a color scheme that complements the overall design of your home. You can opt for a monochromatic palette for a sleek, modern look, or a vibrant, multi-colored scheme for a more eclectic feel. The choice of paint is also crucial. High-quality, durable paint is recommended to withstand the wear and tear of daily use.
The process of painting stairs involves several stages. First, the stairs need to be thoroughly cleaned and sanded to ensure a smooth surface. Then, a primer is applied to help the paint adhere better to the surface. Once the primer is dry, the stairs are ready to be painted. It’s important to apply the paint evenly and allow it to dry completely before applying a second coat.
While the stairs are being transformed, it’s also an opportune time to consider upgrading your kitchen with stainless steel countertops. Stainless steel is a popular choice for countertops due to its durability, ease of maintenance, and sleek, modern appearance. It’s resistant to heat, stains, and rust, making it an ideal material for a busy kitchen.
Stainless steel countertops also offer a striking contrast to painted stairs, creating a balance between the warm, inviting feel of the stairs and the cool, industrial vibe of the kitchen. This juxtaposition can create a visually appealing and harmonious flow throughout your home.
Moreover, stainless steel countertops are incredibly versatile. They can be paired with a variety of cabinet colors and finishes, from classic white to bold black, and everything in between. This flexibility allows you to create a kitchen design that reflects your personal style and complements the newly painted stairs.
In addition, stainless steel countertops are environmentally friendly. They are made from a high percentage of recycled materials and are fully recyclable at the end of their lifespan. This makes them a sustainable choice for homeowners who are conscious about their environmental impact.
In conclusion, the art of painting stairs in your home and the role of stainless steel countertops are two design elements that can significantly enhance the aesthetic appeal and functionality of your living space. They offer a unique way to express your personal style and create a home that is truly your own. Whether you prefer a modern, minimalist design or a more traditional, rustic look, these elements can be tailored to suit your taste and lifestyle. So, why not embark on this creative journey and transform your home into a beautiful, personalized space?