Category: Home Improvement

Rustic Elegance: Adding Rustic Crown Molding to Your Space

Source : https://www.thespruce.com

Rustic Elegance is a unique way to add a touch of rustic charm to any space. rustic crown molding is a great way to add a touch of rustic charm to any room. It is a great way to add a unique and timeless look to any room. rustic crown molding is a great way to add a touch of rustic charm to any room. It is a great way to add a unique and timeless look to any room. rustic crown molding is a great way to add a touch of rustic charm to any room. It is a great way to add a unique and timeless look to any room. rustic crown molding is a great way to add a touch of rustic charm to any room. It is a great way to add a unique and timeless look to any room. rustic crown molding is a great way to add a touch of rustic charm to any room. It is a great way to add a unique and timeless look to any room. rustic crown molding is a great way to add a touch of rustic charm to any room. It is a great way to add a unique and timeless look to any room. rustic crown molding is a great way to add a touch of rustic charm to any room. It is a great way to add a unique and timeless look to any room. rustic crown molding is a great way to add a touch of rustic charm to any room. It is a great way to add a unique and timeless look to any room. rustic crown molding is a great way to add a touch of rustic charm to any room. It is a great way to add a unique and timeless look to any room. Whether you are looking to add a touch of rustic charm to your living room, bedroom, or dining room, rustic crown molding is the perfect way to do it. With its unique and timeless look, rustic crown molding is sure to be a great addition to any space.

How to Achieve Rustic Elegance with Crown Molding: Tips and Tricks

Rustic elegance is a popular interior design style that combines the natural beauty of rustic elements with the sophistication of elegant touches. Crown molding is a great way to add a touch of rustic elegance to any room. Here are some tips and tricks to help you achieve the perfect rustic elegance with crown molding.

1. Choose the Right Material: The material you choose for your crown molding will have a big impact on the overall look and feel of the room. Natural materials like wood, stone, and brick are great for achieving a rustic look. For a more elegant look, consider using materials like plaster or metal.

2. Consider the Color: The color of your crown molding can also make a big difference in the overall look and feel of the room. For a rustic look, choose colors that are warm and earthy, such as browns, tans, and reds. For a more elegant look, choose colors that are cool and neutral, such as whites, grays, and blues.

3. Add Texture: Adding texture to your crown molding can help to create a more rustic look. Consider using a textured paint or a distressed finish to give the molding a more rustic feel.

4. Use Accent Pieces: Accent pieces like corbels and rosettes can help to add a touch of rustic elegance to your crown molding. Consider adding these pieces to the corners of the molding or along the edges to create a more interesting look.

5. Install Properly: Proper installation is key to achieving the perfect rustic elegance with crown molding. Make sure to measure and cut the molding accurately and use the right tools and techniques to ensure a secure and professional installation.

By following these tips and tricks, you can easily achieve the perfect rustic elegance with crown molding. With the right materials, colors, textures, and accents, you can create a beautiful and inviting space that is sure to impress.

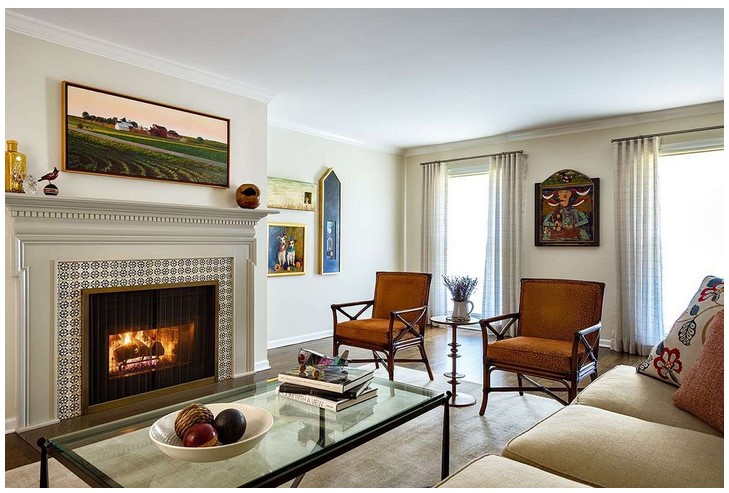
The Benefits of Adding Rustic Crown Molding to Your Home Decor

rustic crown molding is a great way to add a touch of rustic charm to any home decor. This type of molding is made from natural materials such as wood, stone, or metal, and it can be used to create a unique and inviting atmosphere in any room. Here are some of the benefits of adding rustic crown molding to your home decor.

First, rustic crown molding adds a unique and timeless look to any room. The natural materials used to create this type of molding give it a classic and rustic feel that can’t be replicated with other types of molding. This look can be used to create a cozy and inviting atmosphere in any room, making it the perfect choice for a living room, bedroom, or dining room.

Second, rustic crown molding is also very durable and long-lasting. The natural materials used to create this type of molding are designed to withstand the wear and tear of everyday life, making it a great choice for high-traffic areas of the home. This type of molding is also easy to clean and maintain, so you won’t have to worry about it becoming damaged or discolored over time.

Finally, rustic crown molding is also very affordable. This type of molding is typically much less expensive than other types of molding, making it a great choice for those on a budget. With its timeless look and durability, rustic crown molding is a great way to add a touch of rustic charm to any home decor.

Conclusion

Rustic elegance is a great way to add a unique and timeless look to any space. rustic crown molding is a great way to add a touch of rustic charm to any room, and it can be used to create a variety of different looks. Whether you are looking for a classic, traditional look or something more modern and contemporary, rustic crown molding can help you achieve the look you desire. With its timeless beauty and versatility, rustic crown molding is a great way to add a touch of rustic elegance to any space.

Driveway Discoveries: Exploring Creative Gravel Driveway Ideas

Source : https://nextluxury.com

Driveway Discoveries is a blog dedicated to exploring creative gravel driveway ideas. Whether you’re looking for a unique way to spruce up your driveway or just want to learn more about gravel driveways, this blog is the perfect place to start. We’ll provide you with all the information you need to make an informed decision about your driveway, from the types of gravel available to the best installation techniques. We’ll also share inspiring photos of gravel driveways from around the world, so you can get a better idea of what your driveway could look like. So, if you’re ready to start your driveway discovery journey, let’s get started!

Get Creative with Gravel Driveways: Tips for Designing a Unique Look

Gravel driveways are a great way to add a unique look to your home. With a few simple tips, you can create a beautiful and unique driveway that will be the envy of your neighbors.

First, consider the size and shape of your driveway. If you have a large area, you can create a winding path with curves and turns. If you have a smaller area, you can create a straight path with a few curves. You can also use different colors of gravel to create a unique pattern.

Second, consider the type of gravel you want to use. There are many different types of gravel available, including crushed stone, pea gravel, and river rock. Each type of gravel has its own unique look and texture. Choose the type of gravel that best suits your style and the look you are trying to achieve.

Third, consider the layout of your driveway. You can create a symmetrical or asymmetrical design. You can also use different shapes and sizes of gravel to create a unique pattern.

Fourth, consider the edging of your driveway. You can use bricks, stones, or other materials to create a border around your driveway. This will help to keep the gravel in place and give your driveway a finished look.

Finally, consider the maintenance of your gravel driveway. Gravel driveways require regular maintenance to keep them looking their best. Make sure to rake the gravel regularly to keep it level and free of debris. You should also seal the gravel to protect it from the elements.

By following these tips, you can create a unique and beautiful gravel driveway that will be the envy of your neighbors. With a little creativity and planning, you can create a unique look that will last for years to come.

The Benefits of Installing a Gravel Driveway: A Cost-Effective and Eco-Friendly Option

Gravel driveways are becoming increasingly popular due to their cost-effectiveness and eco-friendliness. Installing a gravel driveway is a great way to save money while also helping to protect the environment.

One of the main benefits of installing a gravel driveway is the cost savings. Gravel is much cheaper than asphalt or concrete, making it an ideal choice for those on a budget. Additionally, gravel is easy to install and maintain, meaning that you won’t have to spend a lot of money on labor costs.

Another benefit of installing a gravel driveway is its eco-friendliness. Gravel is a natural material that is not harmful to the environment. It is also a renewable resource, meaning that it can be replenished over time. Additionally, gravel driveways are permeable, meaning that they allow water to pass through them, reducing the risk of flooding and runoff.

Finally, gravel driveways are aesthetically pleasing. Gravel comes in a variety of colors and sizes, allowing you to customize your driveway to fit your home’s style. Additionally, gravel driveways are low-maintenance, meaning that you won’t have to spend a lot of time and money on upkeep.

In conclusion, installing a gravel driveway is a great way to save money while also helping to protect the environment. Gravel is a cost-effective and eco-friendly material that is easy to install and maintain. Additionally, gravel driveways are aesthetically pleasing and low-maintenance. For these reasons, installing a gravel driveway is a great choice for those looking for a cost-effective and eco-friendly option.

Conclusion

Driveway Discoveries: Exploring Creative gravel driveway ideas is a great resource for homeowners looking to add a unique and creative touch to their driveway. With a variety of gravel options, from crushed stone to pea gravel, homeowners can find the perfect material to fit their style and budget. With the help of Driveway Discoveries, homeowners can create a beautiful and unique driveway that will last for years to come.

Turn your Backyard into a Bowling Alley: Here’s How

Gathered beneath the open sky, the backyard bowling alley transforms an ordinary outdoor space into a realm of joyous competition. The sound of rolling balls and triumphant cheers mingle with the rustling leaves, as friends and family take turns aiming for the pins amidst the backdrop of nature’s serenity. Here, strikes and spares intertwine with laughter, creating timeless memories in the heart of your own home.

Source : https://project.theownerbuildernetwork.co

When it comes to creating a fun and engaging outdoor space, the possibilities are endless. One unique and exciting idea is to transform your backyard into a personal bowling alley. Imagine the thrill of rolling a strike in the comfort of your own home, surrounded by nature and your loved ones. Converting your backyard into a bowling alley might seem like a daunting task, but with careful planning and the right approach, it can become a reality. In this article, we’ll guide you through the steps of turning your backyard into a bowling alley.

1. Assess Your Space

Before diving into the project, take a good look at your backyard. Consider the available space and its layout. Ideally, you’ll need a flat and level area for the bowling lane. Measure the dimensions to ensure that you have enough room for the length of the lane and the space required for players to comfortably roll the ball.

2. Plan the Layout

Once you’ve determined that your backyard has enough space, it’s time to plan the layout of your bowling alley. Decide on the direction in which you want the lane to run and mark the starting point and the pins’ location at the other end. Keep in mind that a standard bowling lane is about 60 feet long, so adjust the dimensions according to your available space.

3. Gather Materials

Creating a backyard bowling alley will require some materials. You’ll need:

– Synthetic bowling lane material or artificial turf for the lane
– Bowling pins and balls
– Wooden boards or barriers for the sides of the lane
– Measuring tape, stakes, and string for accurate markings
– Outdoor lighting for evening play
– Optional: seating area and decorative elements

4. Prepare the Lane

Clear the designated area and make sure the ground is level. If the ground isn’t even, you might need to do some digging and filling to create a smooth surface. Lay down the synthetic bowling lane material or artificial turf, securing it in place properly. This surface will provide the ideal conditions for rolling the ball smoothly.

5. Set Up the Bowling Pins

Arrange the bowling pins at the end of the lane, just like in a professional bowling alley. You can purchase a set of pins online or at a sports store. Ensure that the pins are set up in the traditional triangular formation, with the headpin positioned at the center.

6. Build the Lane Barriers

To prevent the ball from rolling off the lane, you’ll need to build barriers along the sides. Use wooden boards or any sturdy material that can withstand outdoor conditions. Attach the barriers securely to the ground on both sides of the lane. This step is crucial for keeping the game safe and contained within the designated area.

7. Mark the Foul Line

Similar to a real bowling alley, mark a foul line a few feet from the starting point. This line indicates where players should stand while rolling the ball. Use stakes and string to create a straight and accurate line. This ensures fair gameplay and adds an authentic touch to your backyard bowling experience.

8. Consider Lighting and Decor

If you plan to play in the evenings or at night, lighting is essential. Install outdoor lighting along the sides of the lane and near the pins so that players can see clearly. You can also add decorative elements, such as potted plants, colorful flags, or even a seating area for spectators to enjoy the game.

9. Invite Friends and Family

With your backyard bowling alley set up and ready to go, it’s time to invite friends and family over for a fun-filled day or evening of bowling. Organize a friendly tournament, complete with scorekeeping and prizes for the winners. Not only will this bring joy and laughter to your gatherings, but it will also create lasting memories for everyone involved.

10. Maintenance and Care

To ensure the longevity of your backyard bowling alley, proper maintenance is crucial. Regularly inspect the lane, barriers, and pins for any signs of wear and tear. Clean the synthetic lane material or artificial turf to prevent debris from affecting gameplay. If you experience any issues, address them promptly to keep the alley in top condition.

Conclusion

Turning your backyard into a bowling alley is a creative and exciting way to make the most of your outdoor space. With careful planning, the right materials, and a dash of creativity, you can create a personalized bowling experience right at home. Whether you’re a bowling enthusiast or simply looking for a unique way to entertain guests, a backyard bowling alley offers endless fun and enjoyment. So, roll up your sleeves, gather your supplies, and start transforming your backyard into a strikingly good time!

Paint Precision: Calculating How Much Paint You’ll Need for Projects

Paint Precision is a revolutionary new tool that helps you calculate how much paint you’ll need for any project. Whether you’re painting a room, a piece of furniture, or a large outdoor structure, Paint Precision can help you determine the exact amount of paint you’ll need to get the job done. With Paint Precision, you can save time and money by ensuring that you have the right amount of paint for the job. Paint Precision also helps you avoid the hassle of having to return to the store for more paint or having to dispose of unused paint. With Paint Precision, you can be sure that you have the right amount of paint for the job.

How to Accurately Estimate the Amount of Paint Needed for Your Project

Accurately estimating the amount of paint needed for a project is an important step in ensuring that the job is completed successfully. To do this, you will need to measure the area that needs to be painted and calculate the total square footage. Once you have this figure, you can then use it to determine the amount of paint you will need.

First, measure the length and width of the area that needs to be painted. Multiply these two figures together to get the total square footage. For example, if the area is 10 feet long and 8 feet wide, the total square footage would be 80 square feet.

Next, you will need to determine the coverage rate of the paint you are using. This is usually listed on the paint can and is expressed in square feet per gallon. For example, if the coverage rate is 250 square feet per gallon, you will need to divide the total square footage of the area by 250 to get the number of gallons of paint you will need. In this example, 80 divided by 250 is 0.32, so you would need 0.32 gallons of paint.

Finally, you will need to account for any additional coats of paint that may be needed. Generally, one coat of paint is sufficient, but if you are painting a darker color over a lighter color, you may need two coats. If this is the case, you will need to double the amount of paint you calculated.

By following these steps, you can accurately estimate the amount of paint needed for your project. Knowing the exact amount of paint you need will help you avoid wasting money on too much paint or having to make multiple trips to the store for more.

Tips for Achieving Professional Results with Paint Precision

1. Prepare the Surface: Before beginning any painting project, it is important to ensure that the surface is properly prepared. This includes cleaning the surface, filling any cracks or holes, and sanding down any rough spots.

2. Choose the Right Paint: Selecting the right type of paint for the job is essential for achieving professional results. Consider the surface you are painting, the desired finish, and the environment in which the paint will be used.

3. Use Quality Tools: Investing in quality tools such as brushes, rollers, and sprayers will help you achieve a more even and precise finish.

4. Use Primer: Primer helps to create a smooth surface and provides a better base for the paint to adhere to.

5. Use Tape: Using painter’s tape to mask off areas that you don’t want to paint can help you achieve a more precise finish.

6. Take Your Time: Painting is a process that requires patience and precision. Take your time and don’t rush the job.

7. Clean Up: Clean up any spills or drips immediately to avoid any unwanted marks or smudges.

8. Inspect Your Work: Once you have finished painting, inspect your work to ensure that you have achieved the desired results.

Conclusion

Paint Precision is an invaluable tool for anyone looking to accurately calculate how much paint they need for their projects. It is easy to use, and provides accurate results that can be used to plan and budget for any painting project. With Paint Precision, you can be sure that you will have the right amount of paint for the job, and that you won’t be wasting time or money on unnecessary paint.

Rocks and Relaxation: Unveiling Creative Rock Patio Ideas

Welcome to Rocks and Relaxation! If you’re looking for creative ways to spruce up your outdoor space, you’ve come to the right place. We’ll be exploring the world of rock patios, from the basics of design and construction to the most creative ideas for making your patio a unique and inviting space. Whether you’re looking for a simple and classic design or something more elaborate, we’ll help you find the perfect solution for your outdoor space. So, let’s get started and explore the possibilities of rock patios!

Exploring the Benefits of Rock Gardens for Relaxation and Stress Relief

Rock gardens are becoming increasingly popular as a way to relax and reduce stress. These gardens are a great way to bring a sense of peace and tranquility to any outdoor space. Rock gardens are low-maintenance and can be tailored to fit any size or style of garden.

Rock gardens are composed of rocks, gravel, and other natural elements such as plants, trees, and shrubs. The rocks and gravel provide a natural texture and color to the garden, while the plants and trees add a sense of life and vibrancy. The combination of these elements creates a calming atmosphere that can help reduce stress and anxiety.

Rock gardens are also beneficial for relaxation because they require minimal maintenance. Unlike traditional gardens, rock gardens do not require regular watering or fertilizing. This makes them ideal for those who do not have the time or energy to devote to a more labor-intensive garden. Additionally, rock gardens are often drought-tolerant, meaning they require less water than other types of gardens.

Rock gardens can also be tailored to fit any size or style of garden. They can be as small or as large as desired, and can be designed to fit any budget. Additionally, rock gardens can be designed to fit any aesthetic, from modern to rustic. This makes them a great option for those who want to create a unique and personalized outdoor space.

Finally, rock gardens are a great way to bring a sense of peace and tranquility to any outdoor space. The combination of rocks, gravel, and plants creates a calming atmosphere that can help reduce stress and anxiety. Additionally, the low-maintenance nature of rock gardens makes them ideal for those who do not have the time or energy to devote to a more labor-intensive garden.

In conclusion, rock gardens are a great way to relax and reduce stress. They are low-maintenance and can be tailored to fit any size or style of garden. Additionally, rock gardens can help create a calming atmosphere that can help reduce stress and anxiety. For these reasons, rock gardens are becoming increasingly popular as a way to relax and reduce stress.

How to Create a Rock Garden Oasis for Maximum Relaxation and Tranquility

Creating a rock garden oasis is a great way to add a tranquil and relaxing atmosphere to your outdoor space. With the right design and materials, you can create a beautiful and peaceful retreat that will be the perfect place to relax and unwind. Here are some tips for creating a rock garden oasis for maximum relaxation and tranquility.

First, choose the right location for your rock garden. Look for a spot that is away from the hustle and bustle of everyday life, such as a quiet corner of your backyard or a secluded area of your garden. Make sure the area is well-drained and has plenty of sunlight.

Next, select the right materials for your rock garden. Rocks are the main feature of a rock garden, so choose ones that are aesthetically pleasing and that will complement the surrounding landscape. Consider using a variety of sizes and shapes of rocks to create an interesting and unique design.

Once you have chosen the rocks, it’s time to start arranging them. Place the larger rocks first and then fill in the gaps with smaller rocks. You can also add plants and other elements to your rock garden to create a more natural look. Consider adding a water feature, such as a small pond or fountain, to add a calming sound to your oasis.

Finally, add some comfortable seating to your rock garden. Choose chairs or benches that are comfortable and inviting, and make sure they are placed in a way that allows you to enjoy the view of your rock garden. Add some outdoor lighting to create a cozy atmosphere in the evening.

By following these tips, you can create a beautiful and tranquil rock garden oasis that will be the perfect place to relax and unwind. With the right design and materials, you can create a peaceful retreat that will be the perfect place to escape from the stresses of everyday life.

Conclusion

In conclusion, creative rock patio ideas can be a great way to add a unique and relaxing touch to any outdoor space. With the right materials and design, you can create a beautiful and inviting area for friends and family to enjoy. Whether you choose to use natural stones, manufactured stones, or a combination of both, you can create a stunning and inviting outdoor space that will be enjoyed for years to come.